The Irresistible Allure of Perfectly Crafted Potato Stacks
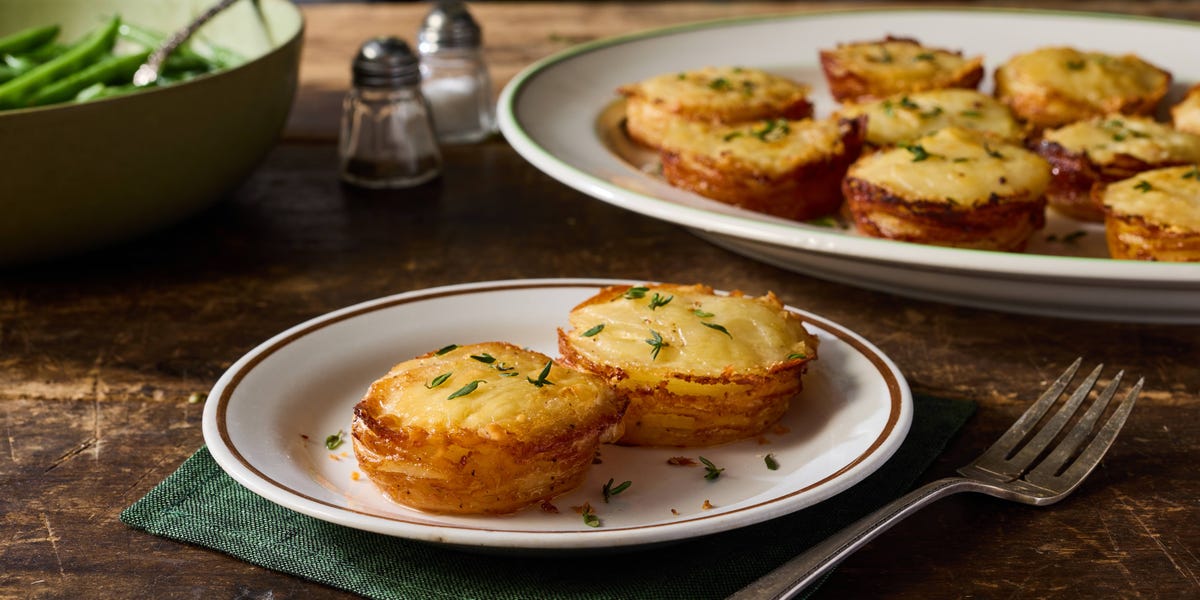
There's something inherently magical about a perfectly prepared side dish that elevates an entire meal. While roasted potatoes and mashed spuds have their undeniable charm, the humble potato takes on an extraordinary elegance when transformed into a stack. These miniature towers of thinly sliced, seasoned, and baked potatoes are more than just a side; they're a culinary statement, offering a delightful contrast of crispy edges and tender, creamy interiors. Whether you're hosting a sophisticated dinner party or simply seeking to impress your family with a truly special meal, mastering the art of amazing potato stacks is a skill worth acquiring.
From choosing the right spud to achieving that coveted golden-brown crisp, every step contributes to the ultimate flavor and texture. This comprehensive guide will walk you through the essential tips and tricks to unlock the full potential of these delightful layered potato creations, ensuring every bite is a testament to your newfound culinary prowess.
The Foundation of Flavor: Choosing Your Potatoes and Precision Prep
The journey to phenomenal potato stacks begins long before they hit the oven. The quality of your ingredients and the meticulousness of your preparation are paramount to success.
Selecting the Right Spud for Your Stacks
Not all potatoes are created equal when it comes to layering. The choice of potato significantly impacts the final texture of your stacks. For crispy edges and a fluffy interior, starchy potatoes like Russets (Idaho potatoes) are an excellent choice. Their high starch content helps them bind together while crisping beautifully. If you prefer a creamier, more tender stack with a slightly buttery flavor, Yukon Golds are your best bet. Their medium starch content offers a wonderful balance. Avoid waxy potatoes like red or new potatoes, as they tend to hold their shape too well and might result in a less cohesive, and less flavorful, stack.
Precision in Slicing: The Mandoline Advantage
Uniformity is key when crafting beautiful and evenly cooked potato stacks. Thin, consistent slices ensure that every layer cooks through at the same rate and contributes to that delicate, tender texture. While a sharp knife and a steady hand can work, a mandoline slicer is truly your best friend here. Aim for slices between 1/16 and 1/8 inch thick – thin enough to become pliable and crispy, but thick enough to hold their structure. If using a mandoline, always use the safety guard to protect your fingers!
Regarding rinsing: Some recipes suggest rinsing sliced potatoes to remove excess starch for crispier results. However, for stacks, this can sometimes make them less cohesive. If you're using a starchy potato like a Russet and want maximum crisp, a quick rinse and thorough drying might be beneficial for the outer layers. For Yukon Golds or for a creamier stack, you can often skip the rinse.
Prepping Your Molds for Perfect Release
Individual molds are typically used to create those impressive, perfectly cylindrical potato stacks. Muffin tins are a popular and accessible choice, as are ramekins or dedicated metal ring molds. Regardless of what you use, proper preparation of your molds is crucial for easy release and beautifully presented stacks. Generously grease each mold with butter or a non-stick cooking spray. For extra assurance, especially with muffin tins, you can cut small circles of parchment paper to line the bottom of each well. This creates a non-stick barrier and helps lift the stacks out effortlessly.
Layer by Layer: Building Your Perfect Potato Stacks
Once your potatoes are prepped, the real artistry begins. The layering process is where you infuse flavor and create the structure that defines incredible potato stacks.
The Art of Seasoning and Fat
Flavor, of course, is paramount. Each layer should be seasoned thoughtfully. Start with the basics: flaky sea salt and freshly ground black pepper are non-negotiable. Beyond that, consider your flavor profile:
- Fats: Melted unsalted butter is classic, providing richness and helping with browning. Browned butter adds a nutty depth. Olive oil or even rendered duck fat can introduce unique flavors.
- Herbs: Finely chopped fresh thyme, rosemary, or sage are fantastic aromatic additions. Garlic powder, onion powder, or a pinch of smoked paprika can also elevate the taste.
- Cheese: For a more decadent touch, a sprinkle of finely grated Parmesan, Gruyère, or sharp cheddar cheese between layers creates a savory, melty interior.
- Liquids: A light brush or drizzle of heavy cream, chicken stock, or a mixture of both, can enhance the moisture and richness, particularly for a Dauphinoise-style stack.
Remember to season and apply fat to each individual layer or every few layers, rather than just at the beginning or end. This ensures even distribution of flavor throughout the stack.
Mastering Layering Techniques
Building the stacks requires a bit of patience and a gentle touch. Take your thinly sliced potatoes and begin shingling them in your prepared molds. Overlap each slice slightly, working your way around the mold to create a circular base. Continue layering, ensuring you spread your chosen seasonings and fat evenly between layers. Don't be afraid to lightly press down on the layers periodically; this helps to compress them, creating a more stable and cohesive stack that holds its shape better once baked.
The number of layers will depend on the size of your molds and your desired height, but typically 10-15 layers per stack can create an impressive visual and textural experience.
Incorporating Flavor Boosters for Extra Zing
While potatoes, fat, and seasoning are the core, don't hesitate to get creative with additional flavor boosters. Thinly sliced garlic cloves, shallots, or even finely minced chives can be layered in for aromatic depth. For a truly elevated experience that justifies why Elevate Your Dinner: Why Potato Stacks are a Must-Try, consider adding tiny bits of crispy bacon, a hint of truffle oil, or a touch of finely grated horseradish for a subtle kick. Just be mindful not to overcrowd the stacks, as this can impede even cooking.
The Heat Factor: Baking for Perfection and Unlocking Crispness
Baking is where the magic truly happens, transforming raw potato slices into a golden, tender, and crispy masterpiece. The right temperature and timing are critical.
Temperature and Time: A Two-Stage Approach
For the best results, a two-stage baking process is often recommended. Start your potato stacks at a moderate temperature, around 325-350°F (160-175°C), covered with foil. This initial phase gently cooks the potatoes through, ensuring they become tender without drying out. This can take anywhere from 30-60 minutes, depending on the size and density of your stacks. Once the potatoes are tender (you can test with a thin skewer), remove the foil and increase the oven temperature to 400-425°F (200-220°C).
Achieving that Golden Crisp and Perfect Finish
The higher temperature during the second stage is crucial for developing that desirable golden-brown exterior and crispy texture. Continue baking uncovered for another 15-30 minutes, or until the tops are deeply golden and caramelized. Keep a close eye on them to prevent burning. If you notice one side browning faster, rotate your baking sheet. For insights into ensuring that perfect crunch, refer to this guide on How to Make Perfect Crispy Potato Stacks Every Time.
Once baked, don't rush to serve them immediately. Allowing the potato stacks to rest in their molds for 5-10 minutes helps them set and firm up, making them easier to unmold and less likely to fall apart. Use a thin knife or offset spatula to gently loosen the edges before inverting them onto a serving plate.
Troubleshooting Common Potato Stack Pitfalls
Even with the best intentions, sometimes things don't go exactly as planned. Here are some common issues and how to avoid them:
- Soggy Stacks: This often happens due to too much moisture, either from un-dried potatoes, too much liquid added during layering, or insufficient baking time at the higher temperature. Ensure potatoes are dry and bake long enough for moisture to evaporate.
- Falling Apart: Lack of proper compression during layering, insufficient starch (from over-rinsing potatoes), or not letting them rest after baking can cause stacks to crumble. Press firmly and allow adequate resting time.
- Unevenly Cooked: Inconsistent potato slice thickness is the primary culprit here. Revisit your slicing technique with a mandoline for uniform results. Also, ensure your oven temperature is consistent.
- Lack of Flavor: Don't be shy with your seasoning! Potatoes need a good amount of salt, pepper, and aromatics. Taste your melted butter/oil mixture before layering to ensure it's punchy enough.
- Sticking to Molds: Inadequate greasing or not lining with parchment paper will cause sticking. Be generous with butter/oil and consider parchment for guaranteed release.
Conclusion: The Stacked Success Awaits You
Creating amazing potato stacks is a rewarding culinary endeavor that brings elegance and unparalleled flavor to any table. By paying attention to the details – from selecting the right potato and slicing with precision, to thoughtful layering and a two-stage baking process – you can consistently achieve stacks that are tender on the inside, wonderfully crispy on the outside, and bursting with flavor. Don't be afraid to experiment with different herbs, cheeses, and fats to make these delectable potato creations truly your own. With these tips in hand, you're now equipped to unlock the full potential of potato stacks and impress your guests and family with this truly extraordinary side dish. Happy stacking!
